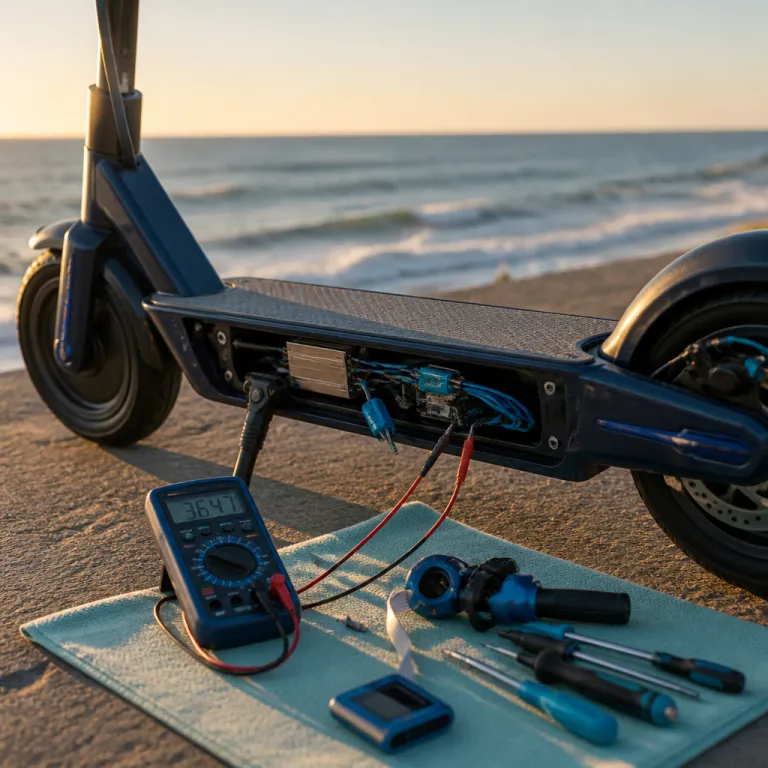
Why controller, throttle and display failures matter more than top speed
Most riders obsess over battery range and motor wattage, then ignore the electronics that actually keep an electric scooter moving. When the scooter controller, throttle sensor and handlebar display start failing, the first symptoms are subtle glitches that appear long before a total loss of power. Treat every new hesitation, throttle dead spot or random display error as an early warning, not background noise.
Think of the controller as the scooter’s brain, the throttle as your right hand’s voice and the display as the translator between them. When any of these components miscommunicate, the motor receives a distorted throttle signal, the battery voltage is misread or the wrong error codes are thrown, and you feel that as jerky launches, delayed acceleration or unexplained cutouts. Electric scooters like the Segway Ninebot Max G30, Xiaomi Pro 2 and GoTrax XR Ultra all rely on the same basic trio of components, even if the housings and connectors look different.
Performance focused riders push these systems harder with higher sustained power, steeper hills and heavier loads. That stress exposes weak wiring, marginal hall sensor calibration in the scooter throttle and undersized motor controller heat sinks much sooner than casual use. If you learn electric scooter controller throttle failure diagnosis as a routine maintenance skill, you catch problems while they are still cheap controller repair jobs instead of full scooter replacement decisions.
Reading the early signs: throttle dead spots, flickering displays and random cutouts
Throttle problems almost never start as a complete failure; they creep in as small dead zones or inconsistent response. You roll on the throttle and nothing happens for a centimeter, then the scooter suddenly surges as the hall sensor finally sends a usable throttle signal to the speed controller. On a Xiaomi Pro 2 or similar commuter scooters, that delay often shows up first when feathering the throttle at low speed in crowded bike lanes.
Hall sensor degradation inside the throttle body usually comes from moisture, vibration or cheap internal components. As the sensor ages, the voltage signal that should sweep smoothly from about 0.8 volts to roughly 3.6 volts starts to jump or drop out, and the scooter controller interprets those gaps as either zero demand or a fault condition. Riders sometimes blame the battery or motor for these issues, but the root cause is often a worn sensor or a corroded throttle connector where the wiring meets the handlebar harness.
Display issues tell their own story, especially when the screen flickers, resets or shows a random error code while riding over bumps. That behavior usually points to a loose connector, cracked solder joint on the display board or water damage creeping in through the display seal and down into the controller housing. If your electric scooter briefly loses power when the display blinks, treat that as a serious controller failure warning and schedule proper scooter repair before the next commute leaves you walking.
For riders who want a broader context on how these electronics fit into overall ride behavior, a detailed guide for informed urban riders can help frame what is normal and what is not in everyday use. Once you understand how a healthy scooter responds to throttle input, shows battery voltage on the display and ramps motor power smoothly, it becomes much easier to notice the first subtle deviations. That awareness is the foundation of reliable electric scooter controller throttle failure diagnosis for both single scooters and larger electric scooters fleets.
Heat, moisture and connectors: how controllers actually fail in the real world
Most controller failures are not dramatic burnouts; they are slow declines driven by heat cycles and moisture ingress. A motor controller that lives inside a cramped deck with poor ventilation bakes every time you hold full power on a long hill, especially on high torque models like the Mantis King GT where sustained current is high. Over time, that heat stresses solder joints, degrades capacitors and makes the controller more sensitive to small wiring problems or marginal battery voltage.
Thermal stress shows up first as reduced power output at sustained speed, where the scooter feels strong for the first few minutes then gradually loses punch as the controller temperature climbs. Some speed controller designs implement thermal rollback, quietly limiting current to the motor while leaving the display and error codes looking normal, which can mislead riders into blaming the scooter battery or even the motor itself. When the internal temperature crosses a hard limit, many controllers trigger a protective shutdown that feels like a sudden loss of throttle with the display still lit but the motor completely unresponsive.
Moisture is the other main killer, and it rarely enters where you expect. Water damage often starts at the display seal, cable pass throughs near the stem or deck ventilation holes, then travels along wiring into the controller housing and finally into sensitive components like the motor hall sensor inputs. Even scooters advertised with IPX4 ratings, such as the Segway Ninebot Max G30, can suffer corrosion at the controller connector pins if ridden regularly through puddles or washed with a pressure hose.
Connector design and placement matter more than marketing claims about weather resistance. XT60 and XT90 connectors on the main battery leads handle high current well, but they still corrode if left sitting in pooled water inside the deck, while Anderson style connectors on phase wires can loosen over time and cause intermittent motor cutouts. Proprietary multi pin connectors between the scooter throttle, display and controller look tidy, yet a single bent pin or hairline crack in the plastic shell can create intermittent signal loss that is extremely hard to trace without a methodical electric scooter controller throttle failure diagnosis process.
When evaluating high performance models, it is worth reading detailed performance and range breakdowns that also mention how the electronics behave under sustained load. A scooter that maintains consistent power output and stable display readings after repeated full throttle runs is less likely to hide latent controller issues. That kind of testing reveals whether the controller, battery and motor system is genuinely robust or just tuned for impressive short sprint numbers.
DIY diagnosis with a multimeter: testing throttle, controller and wiring safely
You do not need a lab bench to perform meaningful electric scooter controller throttle failure diagnosis; a basic digital multimeter and patience go a long way. Before opening anything, always switch the scooter off, disconnect the scooter battery if possible and verify that any circuit breaker or main power switch is in the off position. Once the system is safe, you can start tracing voltage, continuity and signal quality from the throttle to the controller and then to the motor.
Begin at the scooter throttle, where three or more small wires usually carry ground, reference voltage and the variable throttle signal from the hall sensor. With the scooter powered on and the throttle connector carefully back probed, you should see a stable reference voltage around 5 volts between the power and ground wires, and a throttle signal that rises smoothly as you rotate the lever. If the signal jumps, drops to zero intermittently or never leaves a narrow band, you have likely found a failing sensor, damaged wiring or corrosion at the connector that justifies targeted controller repair or throttle replacement.
Next, move to the controller side and check battery voltage at the main input leads while gently flexing the wiring harness. A healthy system will show stable voltage close to the rated pack level, while sudden drops or flickers suggest loose connectors, internal battery problems or a failing circuit breaker that opens under vibration. When the controller receives good power but still throws an error code or refuses to drive the motor, it is time to test continuity on the phase wires and the motor hall sensor leads to rule out broken conductors or hidden water damage inside the motor housing.
Display related issues require a slightly different approach, because the display often shares both power and data lines with the controller. If the display resets when you hit bumps, gently wiggle the display connector and the harness while watching for flickers, then measure voltage at the display input pins to confirm whether the problem is upstream in the controller or local to the display board. Some riders choose to bypass a failing display entirely by installing a compatible third party unit, but that only works when the scooter controller uses standard communication protocols rather than locked down proprietary error codes and pinouts.
While you are already working with the deck open, it is a good moment to think about long term reliability, including how you store the scooter and manage heat around the battery and controller. Keeping the scooter in a hot apartment, for example, can accelerate aging of both the battery cells and the controller’s electronic components if ventilation is poor. A dedicated guide on safe storage practices explains how to protect the battery and electronics from unnecessary thermal stress, which directly reduces the risk of future controller failure and throttle glitches.
When to repair, when to replace and how parts ecosystems are changing
Not every controller failure or throttle issue justifies a full scooter replacement, especially on midrange and premium models where the chassis and motor still have plenty of life. A bare replacement controller for a Segway Ninebot Max G30 or similar commuter scooter often costs a fraction of a new scooter, but labor and the risk of misdiagnosis can erase that savings quickly. The key is to weigh the cost of controller repair, a new display or a fresh scooter throttle against the remaining value of the frame, battery and motor.
As a rule of thumb, if the scooter battery still holds at least 70 percent of its original capacity and the mechanical components are sound, investing in a new controller or display makes sense. When the battery voltage sags heavily under load, the tires and brakes are worn and the deck or stem show structural fatigue, pouring money into electronics becomes harder to justify, because the next failure may be mechanical rather than electrical. In those cases, a clean diagnosis that confirms multiple aging components can help you decide to retire the scooter gracefully instead of chasing intermittent issues through the wiring harness for months.
The parts ecosystem around electric scooters is slowly maturing, and that trend directly affects how you handle future failures. Brands that sell controllers, displays and throttle assemblies as separate, documented components earn more trust from riders who want transparent electric scooter controller throttle failure diagnosis and straightforward scooter repair options. When a manufacturer locks everything behind proprietary connectors, undocumented error codes and sealed housings, even a simple throttle connector fault can force a full handlebar or deck module replacement at inflated prices.
Connector standardization is improving, with XT60 and XT90 plugs becoming common on battery leads and more brands adopting familiar Anderson style connectors on phase wires, which makes cross brand controller swaps more realistic for enthusiasts. However, even when the physical connector fits, you still need to match voltage ratings, current limits, motor hall sensor pinouts and throttle signal expectations between the new controller and the existing components. Treat any major electronics swap as a system level project, not a single part replacement, and always double check wiring diagrams before applying power to avoid turning a minor error into a catastrophic controller failure.
Making your electronics last: practical habits that prevent controller and throttle failures
Once you understand how controllers, throttles and displays fail, you can change daily habits to extend their life. Avoid holding full throttle for long stretches on hot days when the deck already feels warm, because that combination pushes the controller and motor to their thermal limits. Instead, back off slightly on flat sections, let the motor coast when possible and use your body weight to help on steep climbs, which reduces sustained current and internal heat.
Water discipline matters just as much as heat management for long term reliability. Never hose down an electric scooter, and be cautious about riding through deep puddles where water can splash up into the deck, display and stem cable pass throughs, because even brief immersion can start corrosion that shows up as intermittent error codes months later. After any wet ride, park the scooter in a dry, ventilated space, open the deck if you suspect standing water and check connectors for early signs of rust or greenish deposits on the pins.
Regular visual inspections catch many problems before they become expensive failures. Every few weeks, remove the deck cover and look for discolored wiring, melted insulation near the controller, loose connectors on the battery leads and any signs of water damage around the display cable entry point. Gently tug each connector, verify that the circuit breaker or main power switch feels solid and confirm that the display shows stable battery voltage and speed readings without random flickers or unexplained error messages.
Pay attention to how the scooter feels and sounds, because your senses are often the first diagnostic tools. A new buzz from the motor under load, a slight delay between throttle input and acceleration or a display that occasionally resets over sharp bumps are all early clues that the electronics need attention. Treat those clues as invitations to perform a structured electric scooter controller throttle failure diagnosis session, not as quirks to be ignored until the scooter strands you halfway home.
FAQ
How can I tell if my throttle or controller is causing acceleration problems ?
Start by checking how the scooter responds to very small throttle inputs at low speed. If there are dead spots, sudden surges or delays while the display and battery voltage readings stay stable, the issue usually lies with the throttle sensor, its wiring or the throttle connector. When the scooter cuts power under heavy load or after a few minutes of riding, especially with an error code on the display, the controller or battery is more likely at fault.
What multimeter tests are safe for a home rider to perform ?
Most riders can safely measure battery voltage at the main leads, check for a smooth changing throttle signal between the throttle and controller and verify continuity on non live wiring with the scooter powered off. Always disconnect the scooter battery or switch off any circuit breaker before checking continuity, and avoid probing inside the controller housing unless you are comfortable around electronics. If any reading seems erratic or you are unsure about a result, stop and consult a professional scooter repair shop rather than guessing.
Can I replace my stock controller with a more powerful aftermarket unit ?
Upgrading to a higher current controller is possible on many electric scooters, but it is not a plug and play project. You must match battery voltage, motor phase wires, motor hall sensor pinouts, throttle signal type and connector layouts, and you should confirm that the frame, brakes and tires can safely handle the extra power. For most commuters, a like for like controller replacement is safer and more reliable than chasing maximum performance through aggressive controller swaps.
Why does my scooter show an error code only after riding in the rain ?
Intermittent error codes that appear after wet rides usually point to moisture creeping into connectors, the display housing or the controller compartment. As water reaches sensitive components, it can temporarily short pins, change resistance in hall sensor circuits or cause the controller to misread throttle and motor signals, then the problem fades as everything dries out. Repeated exposure eventually leads to corrosion and permanent controller failure, so it is important to improve sealing, reroute vulnerable wiring and dry the scooter thoroughly after each wet ride.
When is it no longer worth repairing an older electric scooter’s electronics ?
Repair makes sense when the frame is solid, the motor runs quietly and the battery still delivers reasonable range, because a new controller or display can restore full function at a modest cost. Once the battery voltage sags heavily, the deck or stem show structural wear and multiple components have already been replaced, each new repair offers diminishing returns. At that point, putting the money toward a newer scooter with a better supported parts ecosystem usually delivers more reliability and safety for the same total spend.